TypeScript is an open-source programming language, developed and maintained by Microsoft, and hosted in GitHub. TypeScript is a superset of JavaScript and can be used to develop JavaScript applications for both client-side and server-side.
This post will cover how to install Node.js and then proceed with installation of TypeScript using the Node Package Manager.


👉 TypeScript Tutorial - Getting started with TypeScript
To get started with TypeScript installation, you need to first install Node.js in your system. Node.js is an asynchronous event driven JavaScript runtime, built on Chrome's V8 JavaScript engine, which uses non-blocking I/O model that makes it lightweight and efficient to build scalable network applications.
The installer comes with Node and npm, where npm is the package manager for JavaScript. It consists of a command line client and an online database, called npm registry, which contains public and paid-for private packages.
Node.js Installation
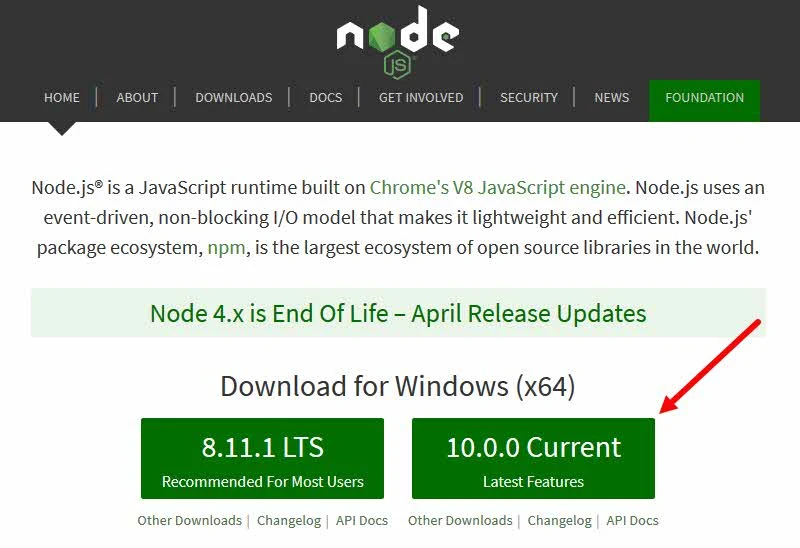
To begin with Node.js installation, head over to https://nodejs.org/en/ in your browser window, where you will see a page like the following one. The installer under the LTS tab is recommended for most of the users, whereas the installer under the Current tab is the latest version of Node. Let's download the latest version, which is 10.0.0 in our case.

Once downloaded, double-click on the installer file and follow the step-by-step process to install the Node.js in your computer. Make sure that the Node.js runtime, npm package manager and Add to PATH are selected for installation. You will need administrative privileges on your system to complete the installation.
Now open any Console Window (cmd.exe) and type the following command: node -v to confirm whether the installation was successful. This will return the installed version number in the console output, which is v10.0.0 in our case. If everything looks good, proceed with the next point to install TypeScript.
TypeScript Installation
As you have already installed Node, it's time to install the TypeScript Package using the Node Package Manager (NPM). To begin with the installation, open any Console Window (cmd.exe) and enter the following command in the prompt:
npm install -g typescript
This will download the latest version from the server, extract it and install on your system. A progress indicator will be shown, marking the current progress of the installation. Here's the screenshot of the final output, for your reference:

Once you are done with the installation, type tsc in the command prompt and hit Enter. This will list the TypeScript Compiler Usages on the console window.
TypeScript Installation using Visual Studio 2017
If you are using Visual Studio 2017, you can simply install it to your Visual Studio IDE from the Visual Studio 2017 installer. Run the installer and click Modify to customize the installation components. Navigate to the Individual components tab and select the desired version of TypeScript SDK that you want to install. Click Modify to perform the installation:

What's Next?
That's all for today. In the next post we will learn more about TypeScript and begin with app development using it. Till then, enjoy reading my other articles/posts.
👉 TypeScript Tutorial - Getting started with TypeScript
CodeProject


